Light painting outdoors can lead to some spectacular shots…
…especially when it’s winter time and the snow is fresh. It can be hard to balance the light and make sure that you’re getting the right amount, but if you do it right you can get some awesome awesome outside shots.
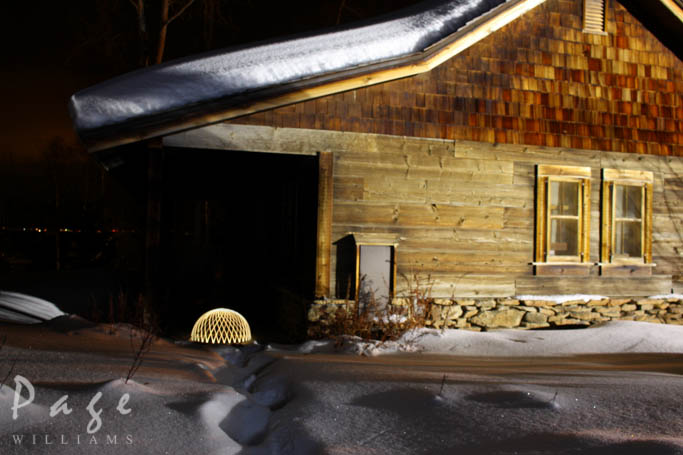
Outdoor light painting is something that I would love to learn more about and experiment more with. You can do some crazy things with it and I’ve only barely scratched the surface. To light paint outdoor, you need a flashlight and a subject. First, you want to shine your light on your subject to make sure your camera is in focus. Next, lock the focus by turning the focus to manual mode. When I was taking my photos of the cabin I had a 30 second exposure at f/8 and ISO 400. you want a long exposure so you can capture the movement of the light.
For the photo of the house I added to photos together on Photoshop using layer masks.
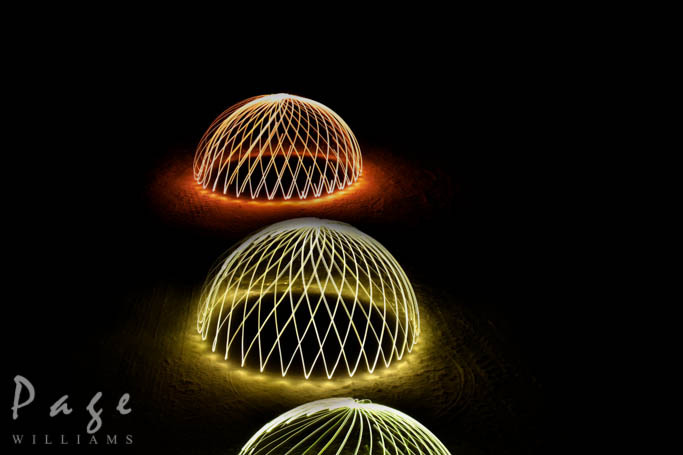
The orb photo was fun to shoot. We had a glowing bike tire on the ground and we spun it once to create an orb at a 3 second exposure. I got a few shots of this and then I changed the color of the orbs and combined them in Photoshop.
The star photo was a little more difficult. I needed the focus on my camera to be at infinity. So I focused on something that was roughly 100 yards. After that it was a kind of guess and check situation. I would press the shutter and while it was open, flash a light around for a few seconds on the snow behind me so that the reflection of the light would bounce onto the post. It took a while to get it right but it looked so great when it turned out!
Let me know what you think!
To check out some cool outdoor light painting go to: http://www.daveblackphotography.com/creative-lighting-portfolio/